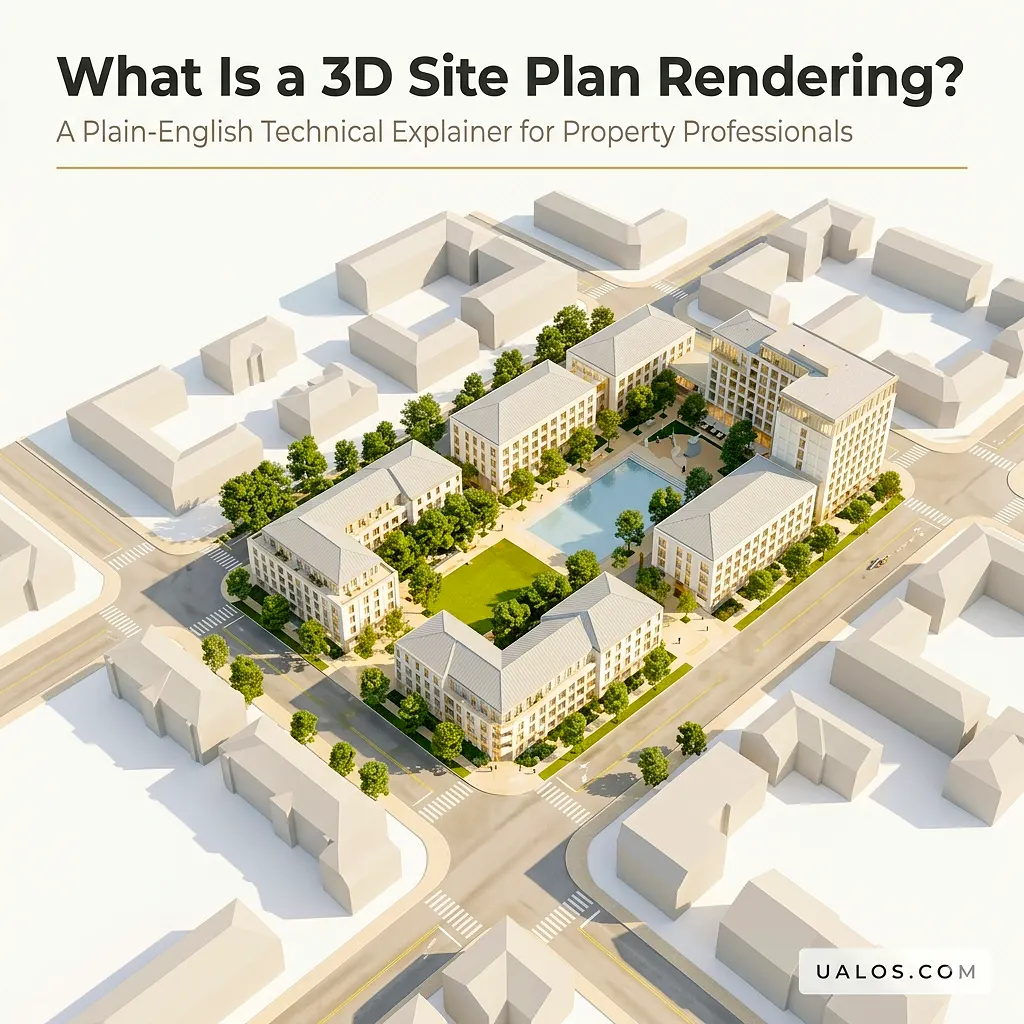
A 3D site plan rendering is a photorealistic, computer-generated overhead visualization that converts georeferenced 2D CAD drawings, topographic surveys, and site data into a fully rendered three-dimensional image depicting buildings, grading, hardscaping, landscape plantings, circulation routes, and environmental context at accurate scale. It is produced through a multi-stage pipeline: base data ingestion (DWG/DXF, GIS layers), parametric 3D model construction, material and texture assignment, global illumination and shadow simulation, and final compositing in rendering engines such as V-Ray, Lumion, or Enscape. The output bridges the interpretive gap between technical site documentation and stakeholder comprehension, functioning simultaneously as a design-validation tool, a planning-approval exhibit, and a pre-sales marketing asset.
Whether you are a property developer, urban planner, architect, or real estate marketing professional, communicating a development vision accurately and persuasively is one of your most critical challenges. A 3D site plan rendering solves exactly that problem.
If you work with complex site layouts, master-planned communities, mixed-use developments, or any project that requires clear spatial storytelling, you need a firm grasp of what this visualization type is, how it differs from other renders, and how to use it strategically. This article explains everything in plain English while keeping the technical precision that property professionals require.
What Is a 3D Site Plan Rendering, Exactly?
A 3D site plan rendering is a bird’s-eye or slightly angled overhead view of an entire development site, rendered in three dimensions with photorealistic or stylized visual quality. Unlike a simple 2D site plan (which is essentially an annotated flat map showing property boundaries, footprints, and dimensions), a 3D rendered site plan adds depth, materiality, realistic vegetation, lighting conditions, and surrounding context.
Think of it as the difference between a technical schematic and a finished architectural illustration. Both convey information; only one communicates vision.
At its core, the rendering does three things simultaneously:
- Communicates spatial relationships – how buildings relate to each other, to the street, and to landscape features
- Establishes scale and proportion – how large structures, parking areas, and green spaces actually appear relative to one another
- Demonstrates aesthetic intent – materials, planting schemes, hardscape finishes, and environmental character
For property professionals working with clients, planners, or investors, this combination of precision and visual clarity is invaluable.
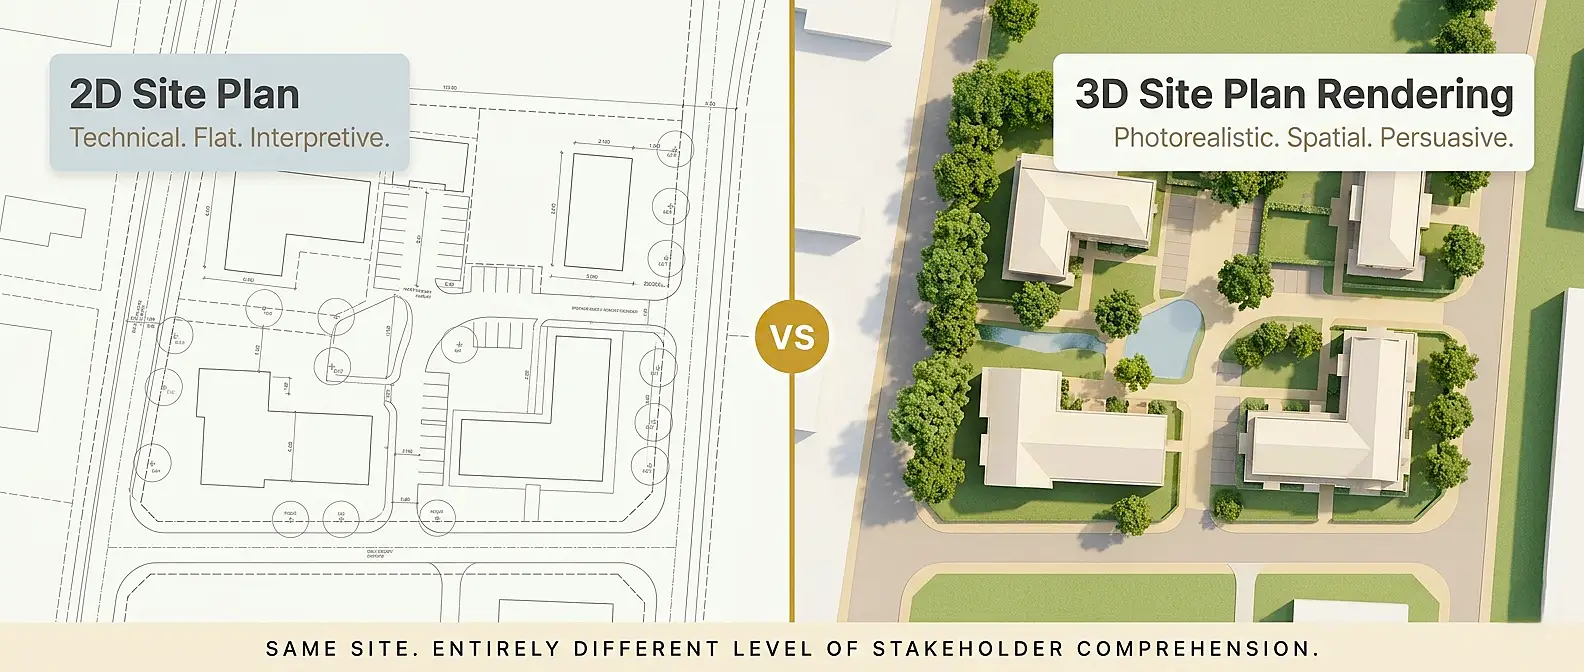
3D Site Plan Rendering vs. 2D Site Plan: Key Differences
Understanding what distinguishes a 3D site plan rendering from its 2D counterpart helps clarify when each is appropriate and why the industry is shifting toward three-dimensional visualization.
The Fundamental Visual Gap
A traditional 2D site plan presents property lines, building footprints, road layouts, and utility locations as flat line-work on paper or screen. It is precise and functional for engineering and permitting purposes. However, according to research across the architectural visualization industry, most clients and many non-technical stakeholders struggle to mentally reconstruct three-dimensional space from flat drawings alone.
A 3D site plan rendering eliminates that interpretive burden entirely.
Side-by-Side Comparison Table
| Feature | 2D Site Plan | 3D Site Plan Rendering |
|---|---|---|
| Visual depth | Flat, line-based | Full three-dimensional depth |
| Material representation | Hatching and color fills | Photorealistic textures |
| Vegetation depiction | Symbols/circles | Realistic 3D tree and plant models |
| Lighting and shadow | None | Accurate sun angle simulation |
| Topographic grading | Contour lines only | Modeled terrain with visible gradients |
| Stakeholder comprehension | Requires training | Intuitive for all audiences |
| Marketing suitability | Low | High |
| Planning/approval use | Primary use | Increasingly required |
| Amendment flexibility | High (simple redline) | Moderate (model revision required) |
| Production time | Fast | Longer, depending on complexity |
As you can see, neither format is superior in every scenario. The 2D plan remains essential for technical documentation. The 3D rendering handles communication, persuasion, and presentation.
Types of 3D Site Plan Renderings
Not all 3D site plan renderings are the same. The type you choose depends on your project’s phase, audience, and objective.
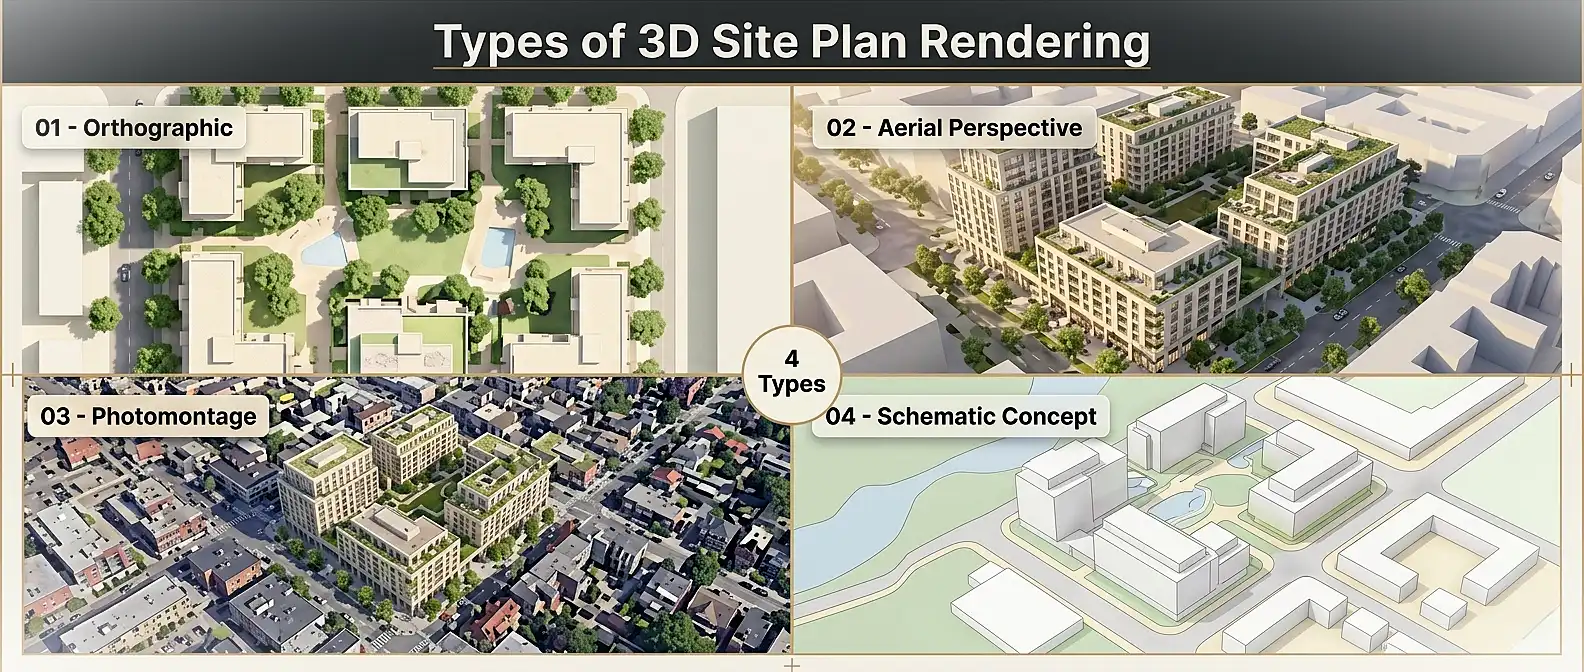
1. Orthographic (Straight-Down) 3D Renders
This is the most common format. The camera points directly downward at 90 degrees, capturing the entire site in a single, perfectly scaled overhead frame. It preserves the functional clarity of a 2D site plan while adding depth, texture, and materiality. This format is widely used for:
- Planning permission applications
- Master plan presentations
- Subdivision marketing materials
2. Aerial Perspective Renders
Here, the camera tilts to approximately 30 to 60 degrees above the site, introducing a dramatic three-quarter perspective. This approach showcases building facades, roofscapes, and surrounding context simultaneously. It is particularly effective for:
- Developer presentations to investors
- Hoarding and billboard graphics
- Pre-launch real estate marketing campaigns
3. Photomontage / Context Integration Renders
These combine a 3D rendered model with real aerial or satellite photography of the surrounding environment. The result places the proposed development convincingly within its actual neighborhood context. Planning authorities in many jurisdictions increasingly request this format as part of environmental impact submissions.
4. Schematic / Concept Renders
Produced during early design phases, these use simplified geometry and illustrative rendering styles. They communicate massing, land-use zoning, and design intent without committing to precise material specifications. Think of them as visual strategy documents.
The Technical Pipeline: How a 3D Site Plan Rendering Is Produced
Understanding the production process helps property professionals brief visualization studios more effectively, set realistic expectations, and provide useful feedback during reviews.
The 3D Site Plan Rendering Pipeline
Base Data Collection
CAD files, GIS data, survey drawings
3D Model Construction
Geometry building, spatial layouts, topological surfaces
Material Assignment
Textures mapping, PBR material properties, surface detail definition
Lighting & Rendering
Global illumination, physical sun/sky settings, final output calculation
Post-Production
Color grading, compositing elements, final quality assurance
Step 1: Base Data Collection and Preparation
The process begins with gathering all available site documentation:
- CAD drawings (DWG or DXF format): architectural plans, landscape layouts, civil engineering drawings
- Topographic survey data: spot levels, contours, retaining structures
- GIS data: boundary information, surrounding infrastructure
- Site photographs: existing conditions, neighboring buildings, street-level context
- Material and planting specifications: if available at this stage
The studio organizes these files into clean, georeferenced layers. Errors at this stage, such as misaligned coordinates or incorrect scale, propagate through the entire workflow. This is why high-quality input data directly affects the accuracy and credibility of the final render. Professional studios offering 3D site plan rendering services will typically conduct a thorough file audit before modeling begins.
Step 2: 3D Model Construction
Using the prepared base data, the visualization team constructs a three-dimensional digital model of the site. Key elements built during this phase include:
- Terrain mesh: sculpted from topographic survey data to represent grading and level changes accurately
- Building volumes: modeled to design intent drawings, including roof forms, fenestration, and facade articulation
- Hardscape and infrastructure: driveways, footpaths, parking bays, retaining walls, service yards
- Landscape elements: tree and shrub placement, lawn areas, water features, boundary treatments
Software platforms commonly used at this stage include AutoCAD for base geometry, SketchUp or Rhino for massing modeling, and specialized landscape tools for planting design.
Step 3: Material Assignment and Texturing
Once the geometry is complete, every surface receives a material definition. This includes:
- Roof cladding textures (tile, metal standing seam, membrane, green roof substrate)
- Facade materials (brick, render, timber cladding, glazing systems)
- Ground surfaces (tarmac, concrete paving, gravel, turf)
- Water surface shaders
The quality of material libraries and UV mapping at this stage is one of the primary determinants of photorealism in the final output.
Step 4: Lighting Setup and Environment
Accurate sun positioning, based on the site’s geographic coordinates and the desired time of day, is configured. Studios typically test multiple sun angles to find the lighting scenario that best reveals the design. Environmental elements, including sky models, atmospheric haze, and ambient light, are calibrated simultaneously.
Step 5: Rendering and Post-Production
The configured scene is processed through a rendering engine, with V-Ray, Corona Renderer, Lumion, and Enscape being industry-standard choices. The engine calculates global illumination, ray-traced shadows, reflections, and ambient occlusion across every pixel.
Post-production in Photoshop or similar tools then handles:
- Color grading and contrast optimization
- People and vehicle placement (for scale and life)
- Additional vegetation layers
- Sky replacement if required
- Final sharpening and output formatting
The entire pipeline, from data receipt to final deliverable, typically takes between 5 and 15 business days depending on site complexity and revision cycles.
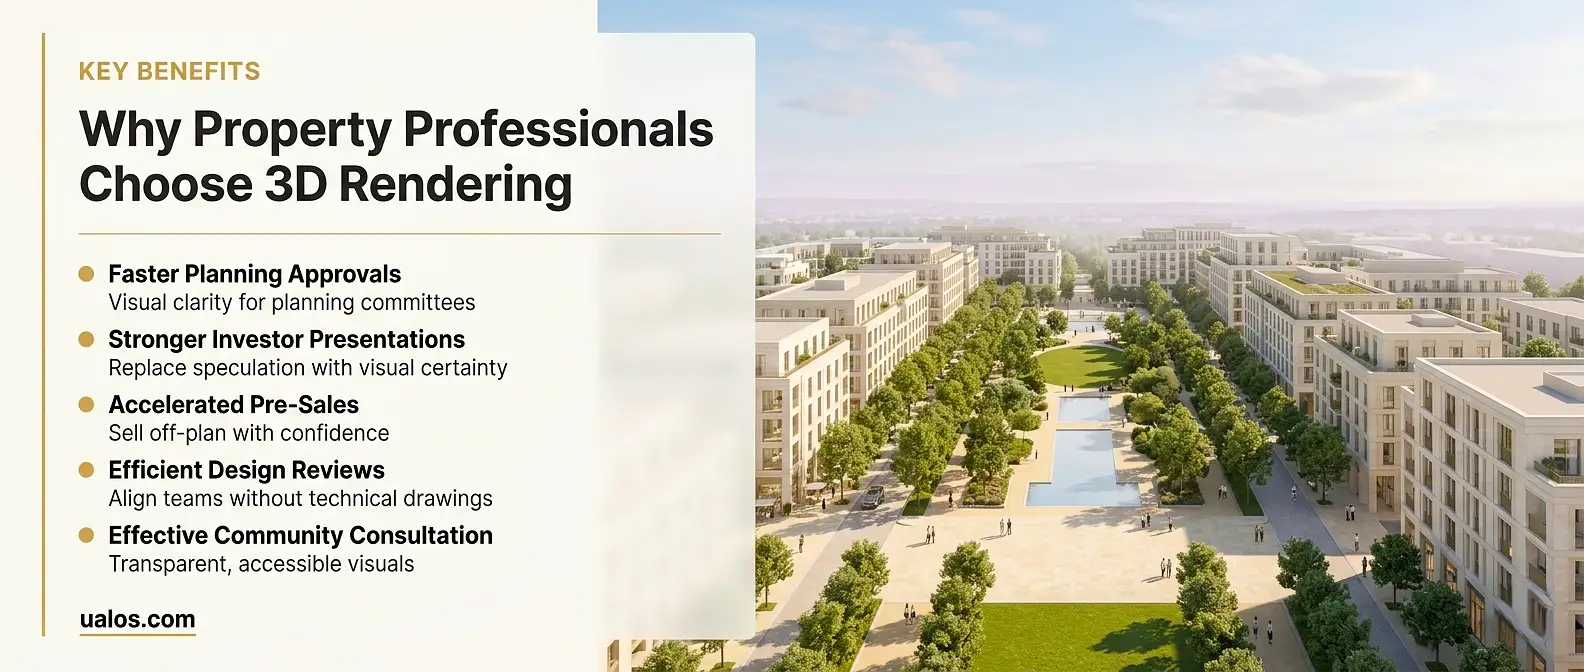
Why Property Professionals Rely on 3D Site Plan Renderings
The adoption of 3D site plan renderings across property development, architecture, and real estate has accelerated dramatically. There are concrete, measurable reasons why.
Accelerating Planning and Permitting Approvals
Planning authorities in many jurisdictions now routinely request three-dimensional visualizations as part of development consent submissions. A well-produced 3D rendering helps planning officers and committee members assess design quality, contextual fit, and impact on the built environment without requiring specialized technical literacy. This clarity reduces back-and-forth queries and can meaningfully accelerate the consent timeline.
Strengthening Investor and Stakeholder Presentations
For development finance, the ability to convey the full scope and quality of a proposed project is often the difference between securing funding and losing it. A photorealistic 3D site plan gives investors, joint venture partners, and boards a precise, credible visualization of what they are committing to. It replaces speculative imagination with visual certainty.
Driving Pre-Sales and Off-Plan Marketing
In residential development, off-plan sales depend entirely on the buyer’s ability to envision a product that does not yet exist. A high-quality 3D site plan rendering deployed across sales brochures, digital hoardings, website landing pages, and sales center displays creates the emotional engagement that drives reservation activity before construction begins.
Supporting Design Development and Design Review
Internally, 3D site plan renderings serve as powerful design coordination tools. They allow design teams to identify spatial conflicts, test massing strategies, and evaluate landscape proposals in a format that non-architects on the client team can engage with productively. Design review meetings become significantly more efficient when a three-dimensional visual replaces a folder of technical drawings.
Facilitating Community Consultation
For larger-scale developments requiring community engagement, 3D renderings provide accessible visuals that residents, community groups, and elected officials can understand and respond to. This transparency supports more constructive consultation processes and reduces the risk of objections rooted in misunderstanding.
Key Elements Depicted in a High-Quality 3D Site Plan Rendering
A comprehensive 3D site plan rendering should accurately represent the following components:
Site Infrastructure:
- Property boundaries and setback zones
- Road layout and access points
- Parking areas and circulation routes
- Utilities corridors (where visible above ground)
Built Form:
- Building footprints and massing volumes
- Roof forms and roofscape elements
- Facade materials and fenestration patterns
- Ancillary structures (bin stores, substations, pergolas)
Landscape and Ecology:
- Tree canopy coverage with accurate species representation
- Shrub planting beds and groundcover zones
- Lawns, meadow areas, and naturalized planting
- Water features, ponds, or SUDs (sustainable urban drainage features)
Environmental Context:
- Surrounding buildings and street network
- Topographic changes and retaining structures
- Views and long-distance context
The presence or absence of these elements directly determines how credible and useful the rendering is across its intended applications.
3D Site Plan Rendering: Common Mistakes to Avoid
Even experienced property professionals sometimes brief 3D visualization projects in ways that undermine the output quality. Here are the most frequent pitfalls:
Providing Incomplete or Outdated Base Data
The rendering is only as accurate as the information it is built from. Submitting an early concept scheme without confirming it reflects the current design intent leads to costly revisions. Always submit the most current drawings and flag any known changes still in progress.
Underspecifying the Landscape
Vegetation is one of the most visually impactful components of any 3D site plan rendering. Briefing it as “some trees and grass” produces generic, unconvincing results. Provide a landscape plan or at minimum a planting schedule indicating species types, heights at maturity, and general massing intent.
Neglecting Surrounding Context
A site plan rendered in isolation, with no surrounding buildings, roads, or context, looks unconvincing and fails to communicate integration with the neighborhood. Always request that the studio model or reference at least one to two building plots of surrounding context.
Conflating Rendering Style with Project Phase
Photorealistic renderings are not always appropriate for early-stage design. Using a detailed photorealistic render to represent an unresolved concept can mislead stakeholders into thinking the design is more advanced than it is. Match the rendering style to the design stage: schematic for concept, photorealistic for planning and marketing.
Setting Unrealistic Timelines
A high-quality 3D site plan rendering for a complex mixed-use scheme requires significant production time. Expecting a detailed, revision-inclusive output in two to three days sets the project up for quality failure. Plan for five to fifteen working days as a baseline.
Expert Tips for Briefing a 3D Site Plan Rendering Project
Getting the best output from your visualization studio requires a thorough and precise brief. Here is what experienced property professionals include:
1. Define the primary purpose first. Is this rendering for planning, for investor presentation, for off-plan marketing, or for design review? Each purpose requires different camera angles, rendering styles, and levels of detail.
2. Specify the output format and resolution. Print-ready outputs (for brochures and hoardings) require 300 DPI at the intended print size. Screen-based outputs require different specifications. Clarify this upfront.
3. Provide a reference mood board. Share three to five examples of rendering styles you admire. Visual references communicate style intent far more effectively than written descriptions.
4. Identify key views. For an orthographic overhead view, the camera is fixed. For aerial perspective renders, specify the primary viewing direction (which elevation of the buildings should be most prominent).
5. Confirm the season and time of day. A summer midday render conveys very different character from a late-afternoon autumn scene. Both have appropriate use cases depending on the project’s context and market.
6. Clarify revision allowances. Agree upfront on how many rounds of revisions are included and what constitutes a revision versus a new brief.
Software and Technology Behind 3D Site Plan Rendering
The professional 3D site plan rendering industry relies on a well-established software ecosystem. Understanding the primary tools helps property professionals assess studio capability and discuss technical requirements more fluently.
Comparison Table: Leading 3D Rendering Platforms
| Software | Primary Use | Rendering Style | Typical Users |
|---|---|---|---|
| V-Ray (Chaos) | High-fidelity still renders | Photorealistic | Architecture, development |
| Lumion | Fast real-time renders | Photorealistic + artistic | Architects, landscape designers |
| Enscape | Real-time visualization | Photorealistic | BIM-integrated workflows |
| SketchUp | Base modeling | N/A (export to render engine) | Concept and schematic design |
| Rhino + Grasshopper | Complex geometry modeling | N/A (export to render engine) | Parametric design |
| AutoCAD | 2D base drawing | N/A | All construction professions |
| Photoshop | Post-production | N/A | Final image compositing |
According to Chaos Group’s official documentation, V-Ray remains the industry-standard choice for architecture and property visualization globally, valued for its physical accuracy and material library depth.
The American Institute of Architects (AIA) notes in its practice resources that digital visualization tools, including 3D rendering, are now considered standard professional practice across architectural and development workflows in the United States and internationally.
When Do You Actually Need a 3D Site Plan Rendering?
Not every project needs a full photorealistic 3D site plan render. Here is a practical decision framework:
You should commission a 3D site plan rendering when:
- Submitting a planning or zoning application for a medium-to-large development
- Presenting a scheme to investors, development finance lenders, or a board of directors
- Launching a pre-sales or off-plan marketing campaign
- Conducting community consultation or a public exhibition
- Coordinating a design review with non-technical stakeholders
- Competing for a site acquisition or development opportunity
You may not need a full 3D site plan rendering when:
- Working on very small-scale single-unit residential developments with no marketing requirement
- Producing purely internal early-concept feasibility studies
- Operating within a jurisdiction where 2D drawings satisfy all planning requirements
Even in these cases, a schematic or concept-level 3D site plan rendering often adds value by reducing misinterpretation in design team discussions.
FAQs: What Is a 3D Site Plan Rendering?
What exactly is a 3D site plan rendering?
A 3D site plan rendering is a computer-generated three-dimensional visualization of an entire development site, produced from a bird’s-eye or aerial perspective. It depicts buildings, landscape, roads, parking, and environmental context with photorealistic or stylized visual quality, derived from 2D CAD drawings and survey data.
How is a 3D site plan rendering different from a regular floor plan rendering?
A floor plan rendering focuses on the interior layout of individual buildings or units, typically viewed from directly above at a small scale. A 3D site plan rendering, by contrast, covers the entire development site at a larger scale, showing how all buildings, outdoor spaces, and infrastructure relate to one another and to the surrounding area.
How long does it take to produce a 3D site plan rendering?
Production timelines vary by complexity. A straightforward residential subdivision may be completed in 5 to 7 business days. A large-scale mixed-use or masterplan project with extensive context modeling may require 10 to 15 business days or more, including revision cycles.
What files do I need to provide to get a 3D site plan rendering?
At minimum, you need to provide current CAD drawings (DWG or DXF format) showing site layout, building footprints, levels, and landscape intent. Topographic survey data, site photographs, material specifications, and a planting plan significantly improve output accuracy and quality.
How much does a 3D site plan rendering cost?
Pricing varies considerably based on site complexity, level of detail, rendering style, and required output formats. Simple residential sites start at a few hundred dollars; complex mixed-use masterplans can run into several thousands. A reputable 3D site plan rendering company will provide a detailed quote based on your specific brief.
Can 3D site plan renderings be used for planning applications?
Yes. Many planning authorities now accept or actively request 3D renderings as part of development consent submissions. Some jurisdictions have specific guidance on the information that renderings must contain for planning purposes. Always confirm local requirements before briefing.
What rendering software produces the best 3D site plan renders?
V-Ray and Lumion are the most widely used platforms for high-quality 3D site plan rendering in the property industry. V-Ray excels in photorealistic accuracy; Lumion offers faster production with a strong artistic quality. The right choice depends on project requirements and studio workflow preferences.
What is the difference between a 3D site plan rendering and a 3D aerial render?
The primary distinction is camera angle. A 3D site plan rendering uses a strict overhead or near-overhead viewpoint (typically 60 to 90 degrees from horizontal) to maintain functional plan-reading clarity while adding three-dimensional depth. A 3D aerial render typically uses a lower, more dramatic angle (30 to 60 degrees) to showcase building elevations and create a more cinematic effect.
Elevate Your Project Communication with 3D Site Plan Rendering
Understanding what is a 3D site plan rendering equips you to use this visualization tool strategically across every phase of property development, from planning applications and design reviews to investor presentations and pre-sales campaigns.
The core value proposition is clear: a 3D site plan rendering translates technical precision into visual clarity, enabling every stakeholder – whether a planning officer, development funder, or future homeowner – to understand, evaluate, and engage with your project on a meaningful level. It accelerates decisions, reduces misinterpretation, and positions your development compellingly in a competitive market.
The difference between a project that wins approvals quickly, secures funding confidently, and sells ahead of program – and one that doesn’t – often comes down to how well the vision is communicated. A high-quality 3D site plan rendering is one of the most powerful tools in a property professional’s communication arsenal.
Ready to transform your site plans into compelling, investor-ready visuals? Partner with our professional 3D site plan rendering team and discover how expert architectural visualization accelerates your development from concept to completion.
Contact a globally trusted and reliable 3D site plan rendering company